
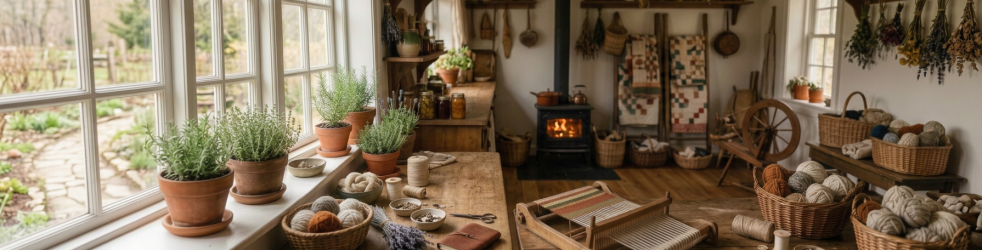
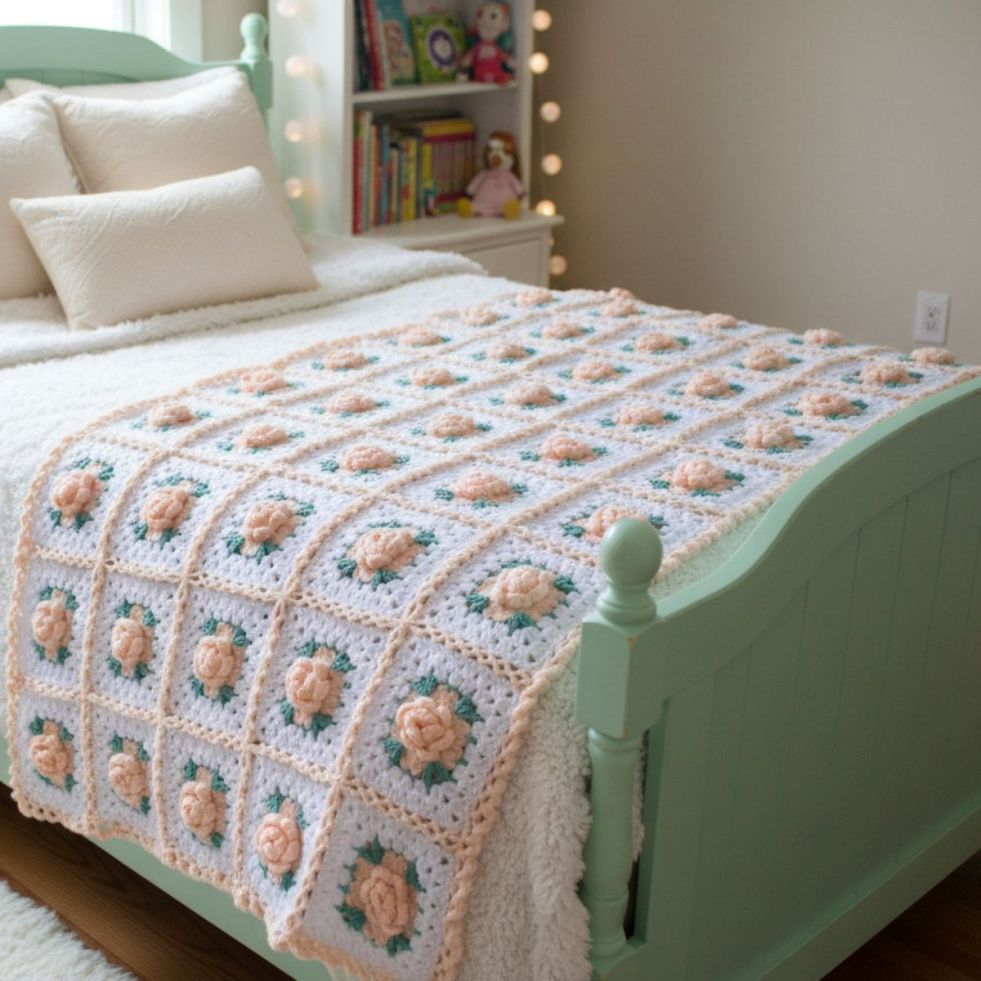
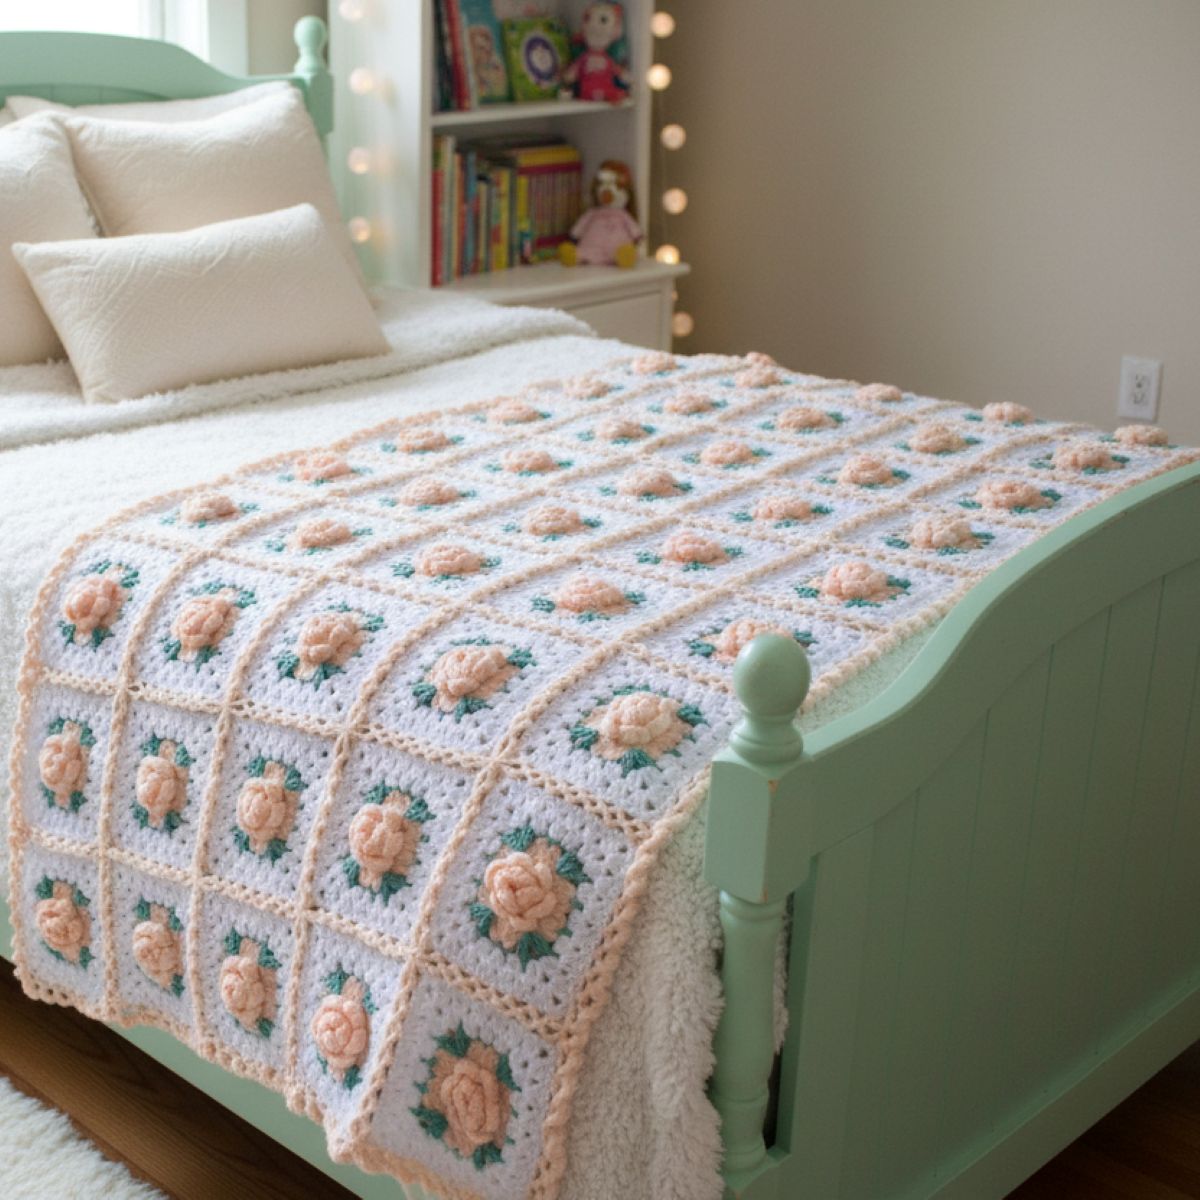
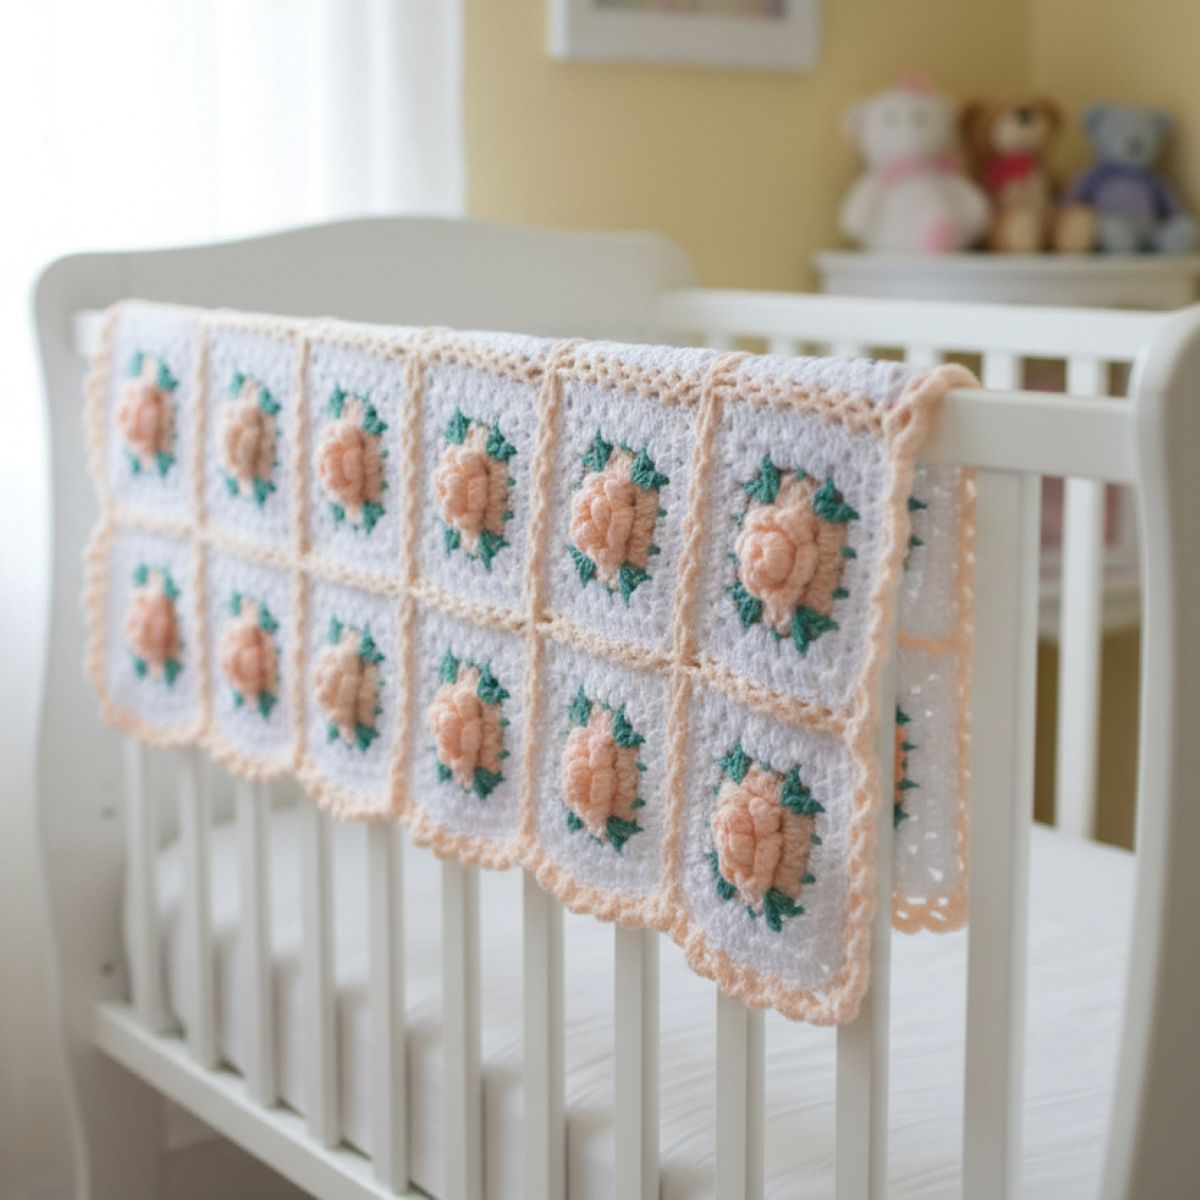
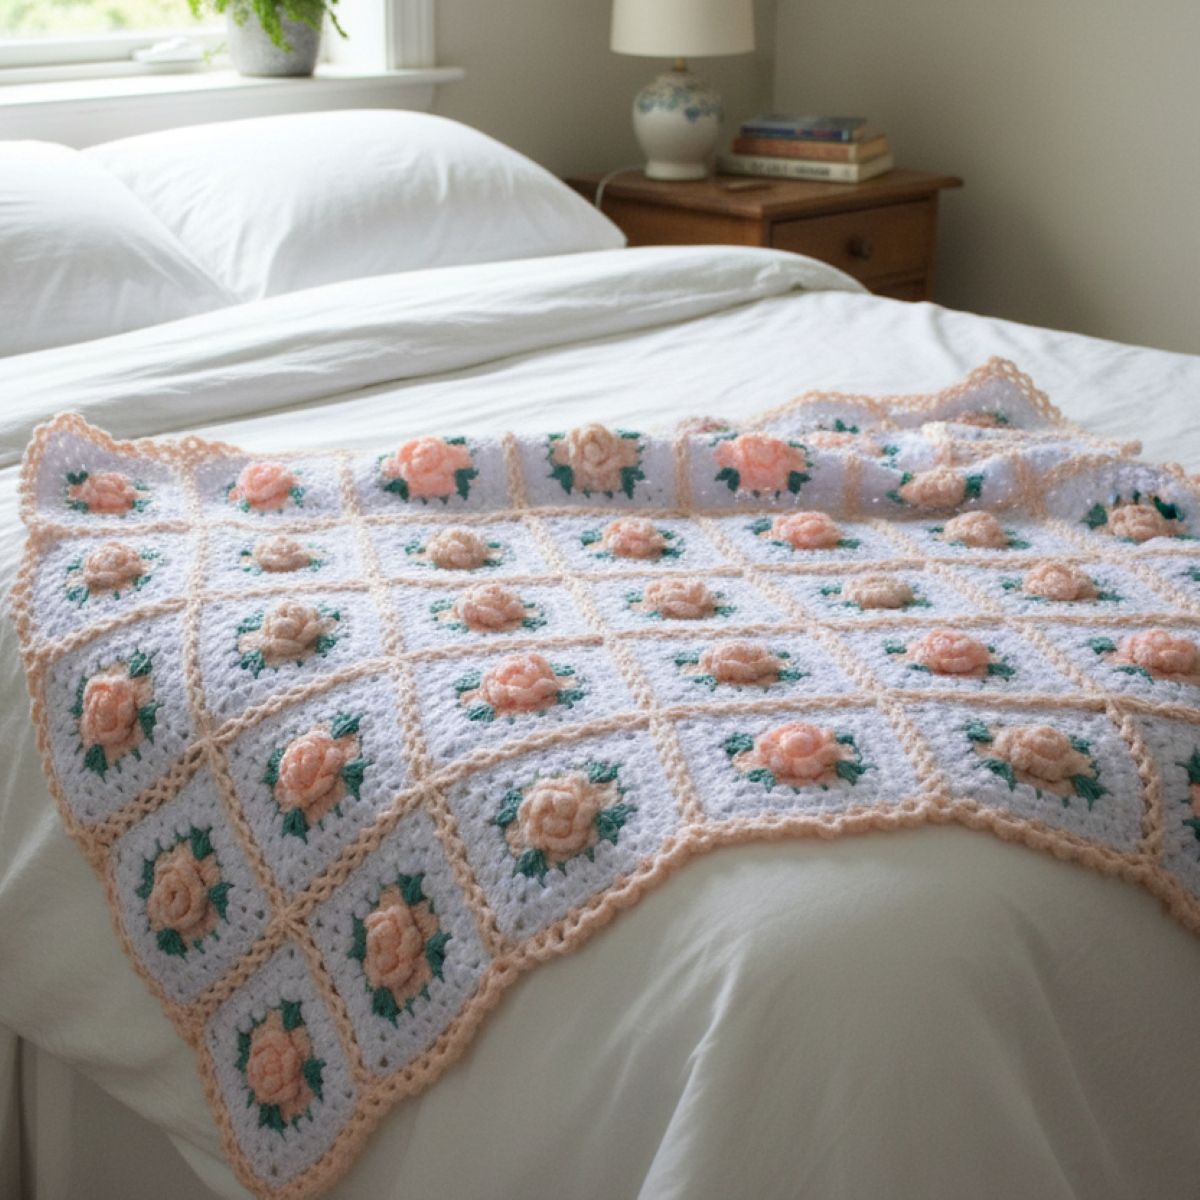
This pattern channels the French Provincial style. Transform simple stitches into lush 3D rose granny squares and join them into a shabby‑chic bed cover or cosy afghan.
Skill Level:
Suited to confident, non‑beginner crocheters.
Materials:
A full size afghan (50 x 65”) will take about 12-14 100g balls or skeins of medium weight yarn (worsted weight/DK or 8 ply), of which only two is needed for the green parts you see in the photo, the rest should be 6-7 balls each of the other two colours (white and pink in the photo). It’s a good idea to buy a bit more if you can. Any leftovers you can use for a cushion cover.
Hook size should be chosen to suit the yarn (check the labels of the yarn).
Estimated Yarn Requirements for Other Sizes Using Worsted Weight Yarn:
Lapghan (36″ x 48″) → 1,500–2,500 yards (5–8 skeins, 200–300 yards each)
Throw (50″ x 60″) → 2,500–3,500 yards (8–12 skeins)
Twin (66″ x 90″) → 3,500–5,000 yards (12–16 skeins)
Full/Double (80″ x 90″) → 4,500–6,500 yards (15–22 skeins)
Queen (90″ x 100″) → 5,500–8,000 yards (18–26 skeins)
King (108″ x 100″) → 6,500–10,000 yards (22–32 skeins)
Stitches Used (USA) Terms:
CH: chain stitch
SL ST: slip stitch
SC: single crochet
DC: double crochet
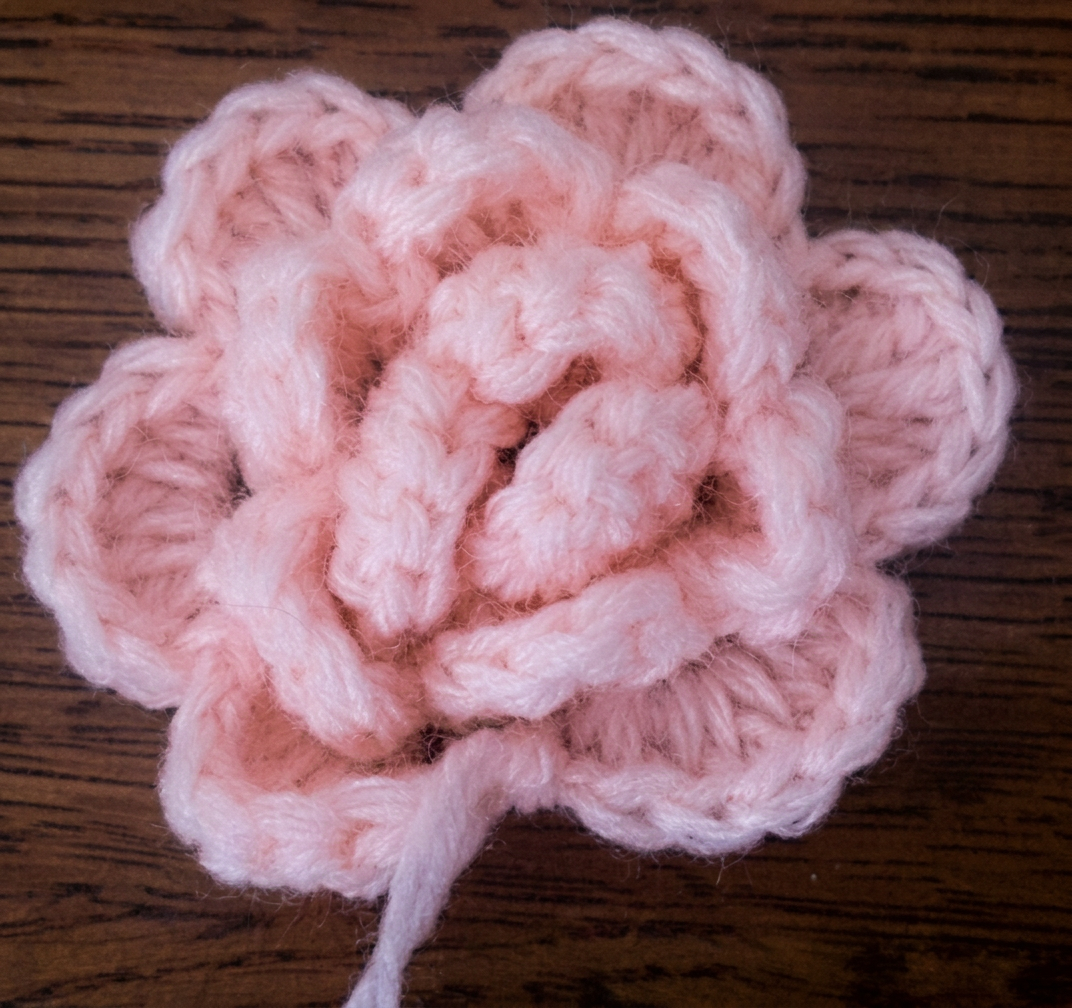
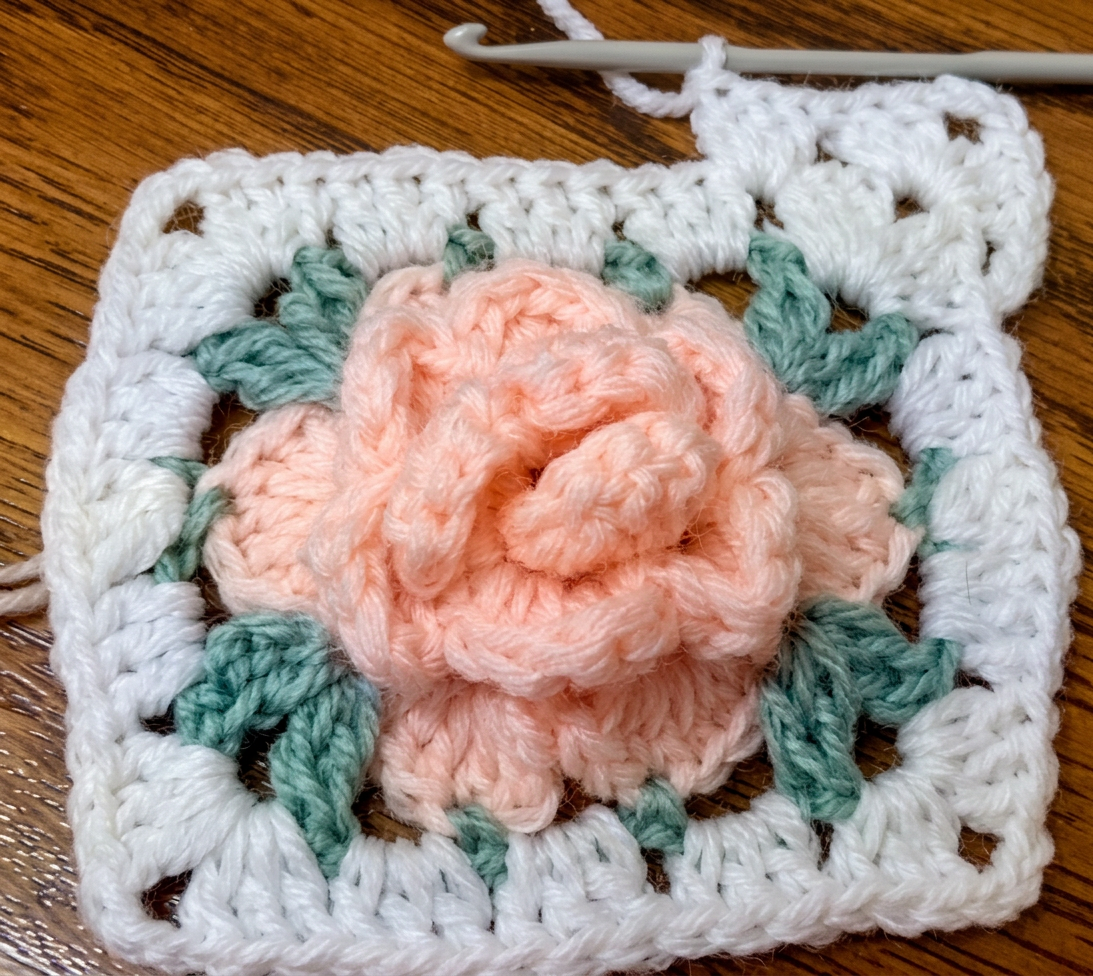
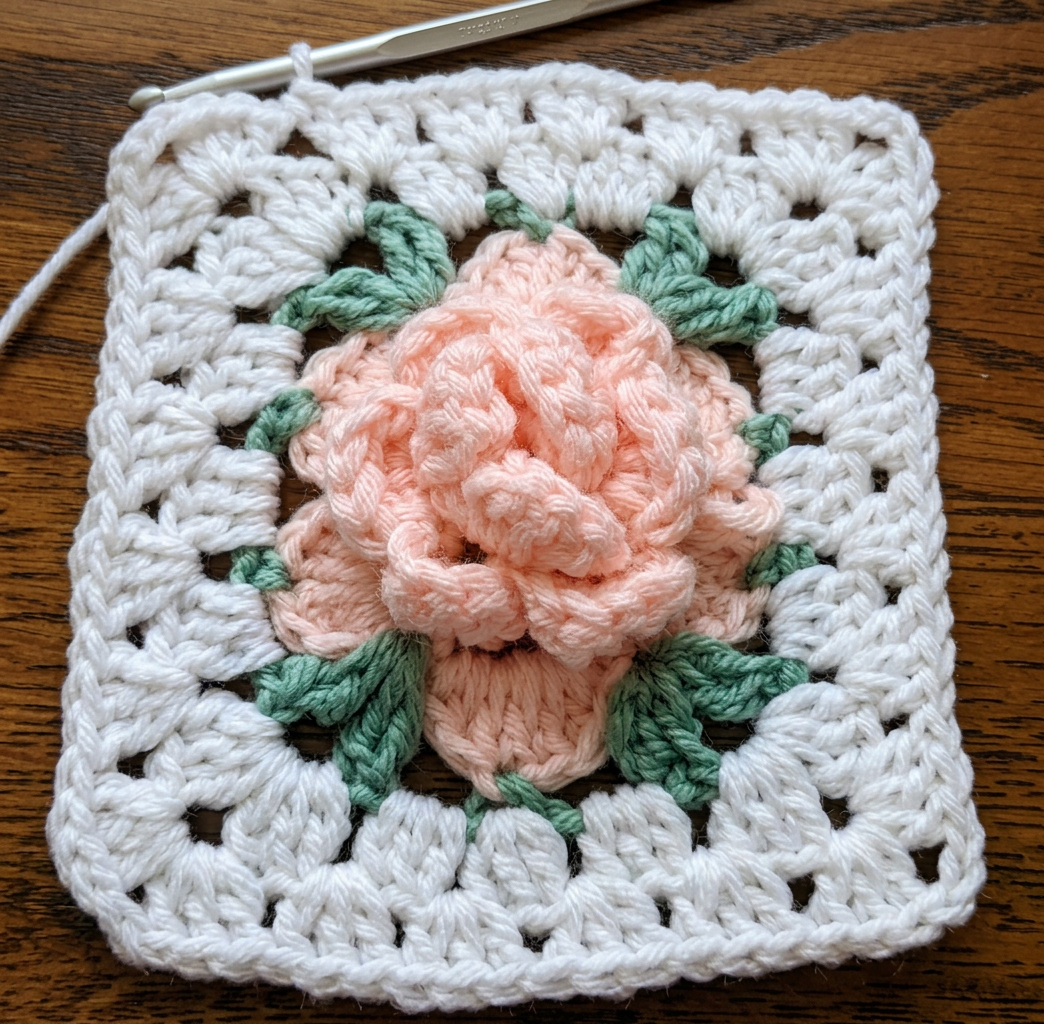
The main feature is the Irish style 3D rose which in this pattern has 3 layers of petals: starting with 3 inner petals, then adding two more rounds with 6 petals each.
- With a colour you want for the roses CH 4 and join with a SL ST to form a ring (or use a magic loop if you prefer).
- CH 2 to stand as your first SC, then work 8 SC into the ring, SL ST to join the last one to the first SC (which was your 2 CH at the beginning).
- *CH 3, skip 2 SCs of the second row, 1 SC into the next SC*, repeat * to* 3 times (3 loops in total).
- *CH 2 and work 4 DC into the 3CH spaces, CH 2 and SL ST into the same space. SL ST into the next loop*. Repeat * to * twice to finish the first 3 petals of the rose.
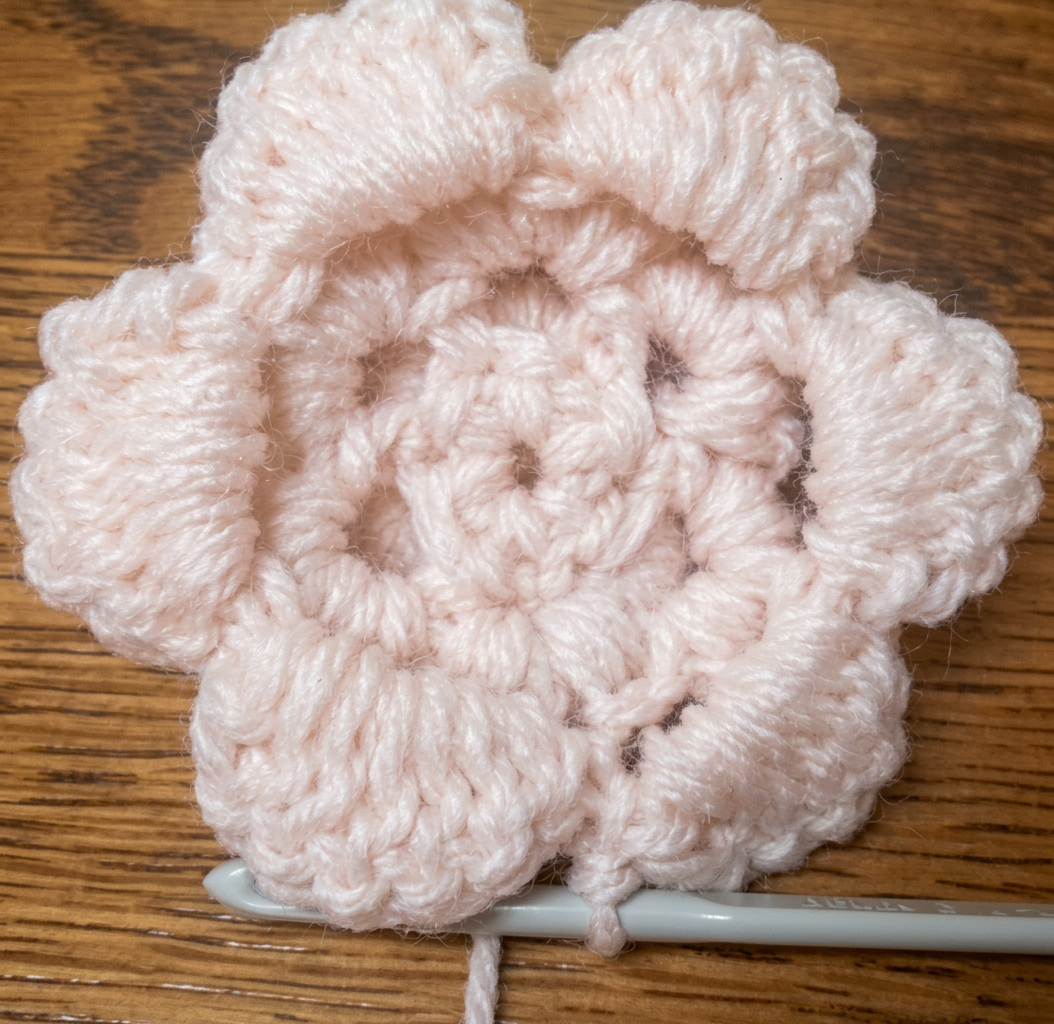
- CH 1, SL ST in base (in the back) of the SC of the second row (not the 3rd), then work six 4 CH loops behind the 3 petals you made in the previous row, stitching them back evenly into the SCs of the second row with a slip stitch until you reach the end (if the 4 CH loops end up in front of the petals, pull on the CH 4 loops so that they are behind the petals, before working the next round).
- *CH 2 and work 5 DC into each of the 4 CH spaces, CH 2 and SL ST into the same space. SL ST into the next loop*. Repeat * to * 5 times to finish the second row of petals of the rose (6 petals in total).
- CH 1, SL ST in base (in the back) of the SC of the 5th row, then work 6 X 5 CH loops
behind the 6 petals you made in the 6th row, joining them all to the base with a SL ST.
*CH 2 and work 6 DC into each of the 5 CH spaces, CH 2 and SL ST into the same space. - SL ST into the next 5 CH loop*. Repeat * to * 5 times to finish the third and final row of 6 petals of the rose. Cut the thread.
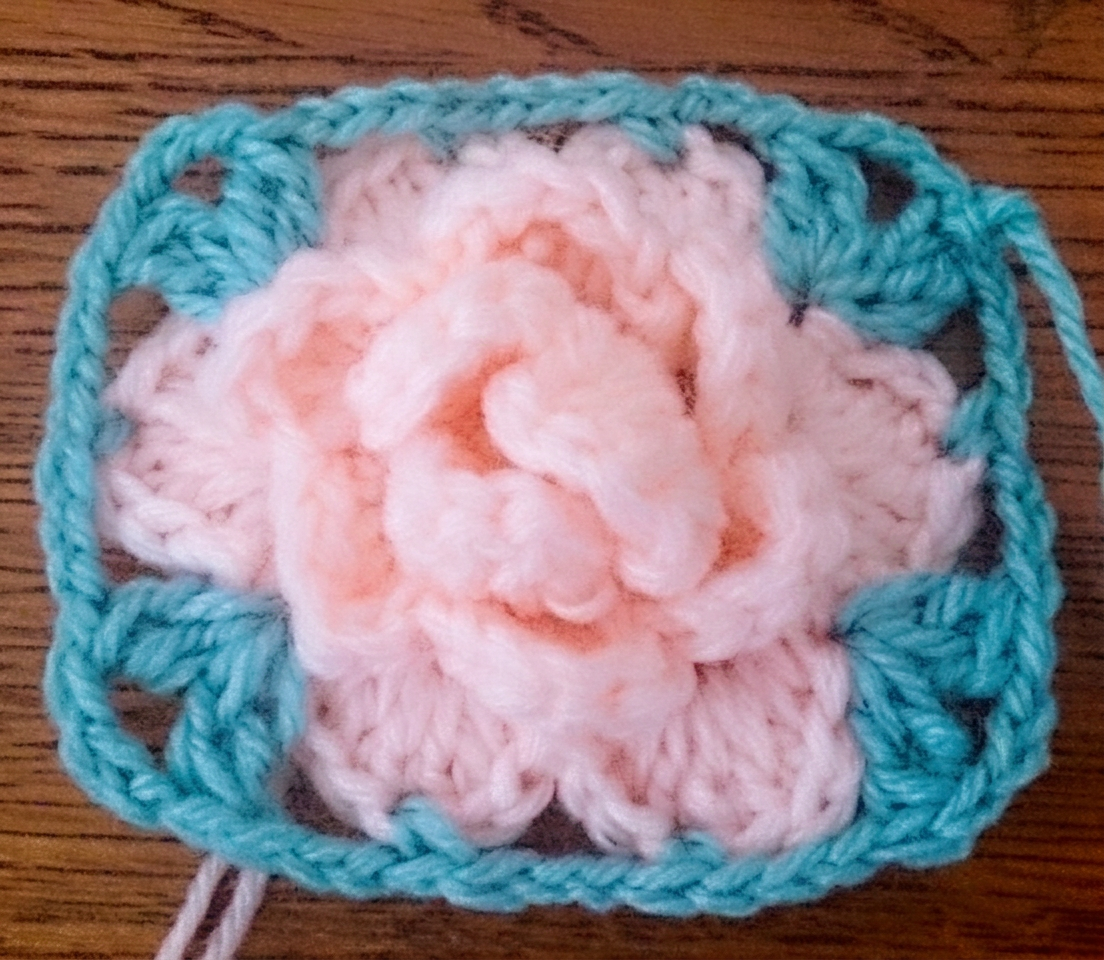
- With green (or the colour you chose for the leaves) SL ST into any of the gaps between the last row of rose petals. CH 3, then work 1 DC into the same space, CH 3, then work 2 DC into the same space. CH 3 and work 1 SC into the top of the first rose petal, CH 3 again and work 1 SC into the second petal. CH 3 and work 2 DC, 3 CH, 2 DC into the gap between the 2nd and 3rd petal. CH 3 and work 1 SC into the 3rd petal, CH 3 then 2 DC, 3 CH, 2 DC into the gap between the 3rd and 4th petal. CH 3 and work 1 SC into the top of the 4th rose petal, CH 3 again and work 1 SC into the 5th petal. CH 3 and work 2 DC, 3 CH, 2 DC into the gap between the 5th and 6th petal. CH 3 and work 1 SC into the 6th petal, CH 3 and Finish the row with a SL ST to the 3rd CH you started with. Cut the thread. You now have a small square.
- Using the base colour (white in the photos), SL ST into any of the 3 CH spaces on the corner of your square (between the groups of 2 DC), CH 3 to stand as your first DC, then work 2 DC, 3 CH, 3 DC into the same space. *Skip to the next 3 CH space, work a cluster of 3 DC, another 3 DC into the SC, and 3 more DC into the next 3 CH space, so 9 DC in total between the corners. Skip to the 3 CH space on the next corner, work a cluster of 3 DC, 3 CH, 3 DC into it*, then repeat from * to * on all four sides of the square (total number of DCs on each side of the square will be 15, separated with a 3 CH space on each corner).
- CH 3, skip to the 3 CH space on the corner of the square, work a 3 DC, 3 CH, 3 DC cluster into it, then proceed with working 3 DC (granny) clusters into the gaps between the three 3 DC clusters of the previous row. Join with a SL ST at the end of the row but only work two DC instead of the last 3, as you already made the first one with the 3 CH at the beginning.
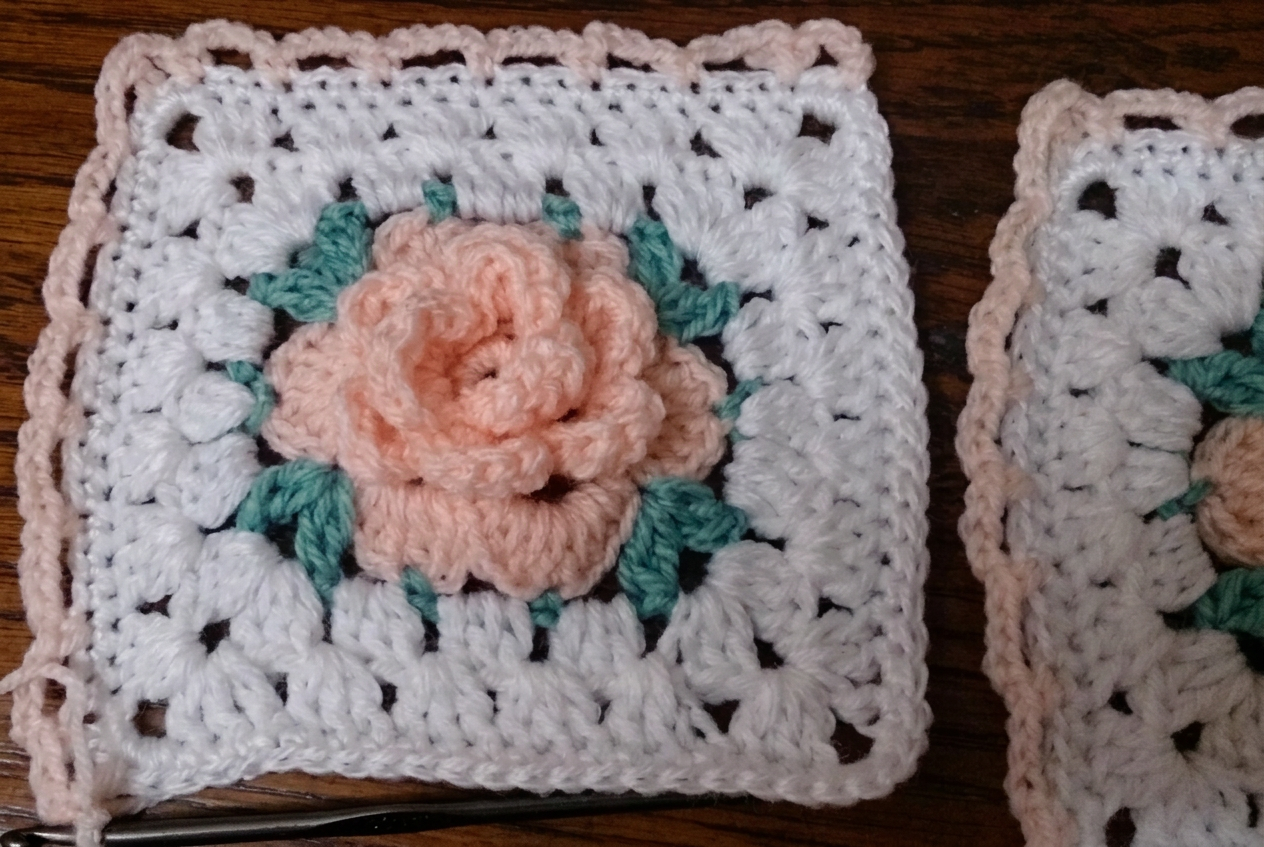
- CH 2, then work 1 SC into each of the previous row’s DCs, 5 SC into the 3 CH spaces at each corner. Join with a SL ST at the end of the row. You will have 18 SC on each side of the square + 5 SC in the corner 3 CH spaces, so a total of 92 SC. Cut the thread.
Join as you Go
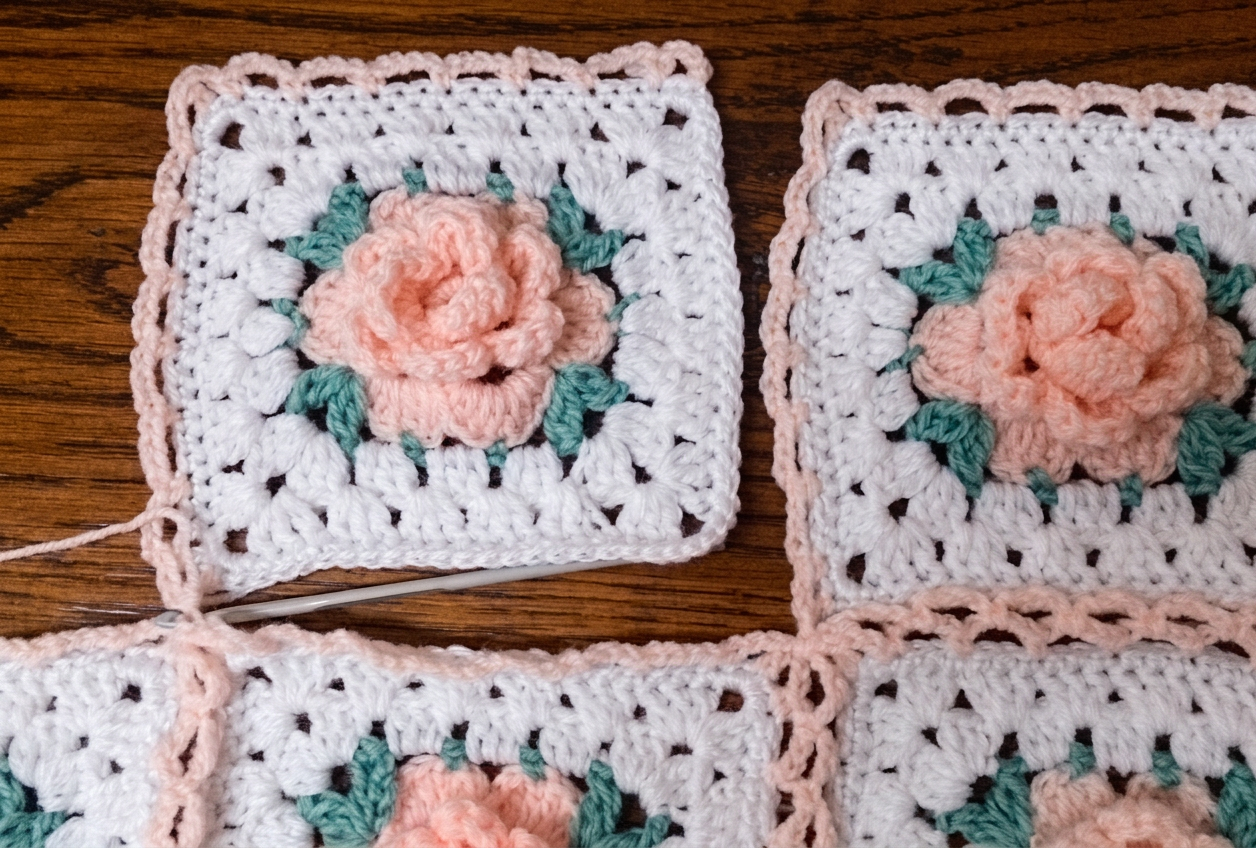
With a colour you want to use for joining the squares (I used one of the pink ones) SL ST into the middle (3rd) SC on any corner and CH 4, skip 2 SCs of the previous row, work 1 SC into the next SC and repeat this on each side of the first square, then join with a SL ST at the end of the row. You should have eight 4 CH loops on every one of the 4 sides of the square. Only do this with the first square and the rest of them will have to be joined to form your afghan or other project as shown in the photos.
Complete only two sides of the next square with the 4 CH loops, then start joining it to the first one chaining only 2 and using a SL ST to attach to the corresponding loop of the first square, CH 2 again and SC back to the second square.
When all your squares are joined, using still the same colour, work 5 CH loops into the perimeter joining them with a SC to the top of each loop on the outer sides of the squares along the perimeter of the afghan, then in the next row finish the blanket with working 1 SC, 4 DC, 1 SC into each of the 5 CH loops as the edging. You can of course use any other edging, such as a simple row of DC or a fancy lacy edging if you want. You can also make this pattern into a cushion, but you might want to join the squares with a different method or just sew them together to eliminate the gaps between the squares.

